
Creating an Academic Plan for Students in Academic Planner
This workflow guide explains how an advisor creates an Academic Plan for one of their students using the Next Generation Academic Planner.
Start Creating an Academic Plan
Select a student from the Assigned Students list or search for a student in the quick search bar at the top of the Navigate home page to open a Student Profile.

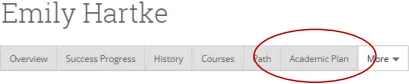
To start creating an Academic Plan for the student, select the Academic Plan tab from the Student Profile menu.
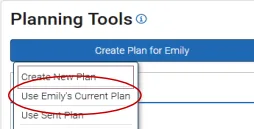
Shared Workspace opened on the Search page in Edit mode. Select Use NAME’s Current Plan from the dropdown menu. You may also choose to work in current or sent plan.
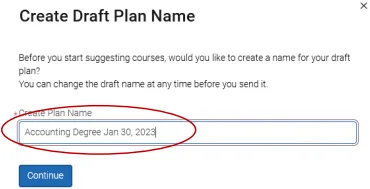
Add a Draft Plan Name in the dialog that opens. Click Continue to start creating the plan.
Building a Draft Plan
The Shared Workspace is now editable. There are several actions you can take. Let’s begin with adding a template.
Adding a Template
Select the Add Templates link. The center panel of Shared Workspace now displays the Add Additional Templates page. A list of new templates with catalog years is on this page. If a template matches a student’s academic goals (ex, major, program, minor, concentration) and catalog year, it will be indicated as Recommended with a green, filled star in the Recommended column. Choose one for the student by selecting the Add to My Templates button.
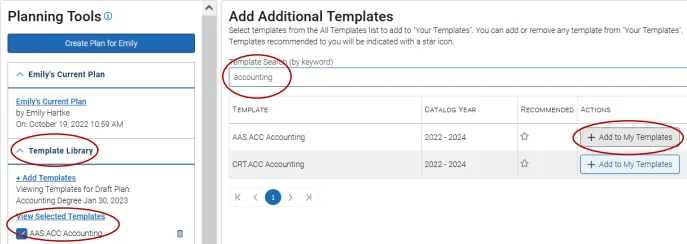
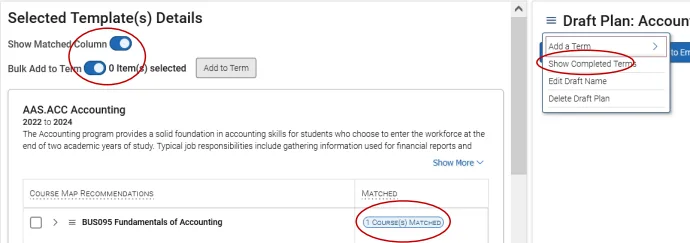
The template then appears in the left column under Student Plan Templates. Select View Selected Template to view the program requirements in the middle column. Here, you can choose to show matched courses by toggling the Show Matched Column. You can also choose to add multiple courses to a plan at once by toggling Bulk Add to Term.
Show and Add Terms
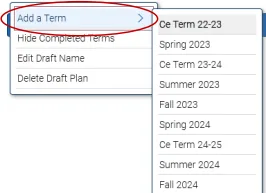
Next, begin building the draft plan with terms in the right-hand column. To show terms that a student has completed, select Show Completed Terms from the Draft Plans hamburger menu. To add a new term, click the Add a Term button and choose a term from the dropdown. You can then add more terms by repeating these actions. Once finished, you can add courses from the template or by using enhanced search.
Adding Courses from Template
You can use the program template to create an Academic Plan. The template details appear after you select a template name (or after clicking Back to Planning on the Search for Courses page). The Matched columns indicate courses that are already on a student’s plan because they have either planned, registered for, or completed the course.
Bulk Add to Template
To assign multiple courses to an Academic Plan at once, turn on the Bulk Add to Term toggle. To assign courses to a term, select the checkbox in front of the courses and/or placeholders that should be added to the term. Placeholders show a recommendation title, e.g., Composition I. Expand the placeholder recommendation by clicking the button in front of the placeholder to reveal the course(s) within that recommendation. You can add the placeholder or a specific course in the placeholder group.
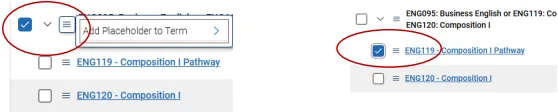
An actual course will show the course title and number and include a clickable link. After selecting the courses and placeholders to add to the term, click the Add to Term button and select the term you want to assign them to. If you select a placeholder, the student must select the actual course section to schedule and register for. This reminder appears in the Academic Plan.
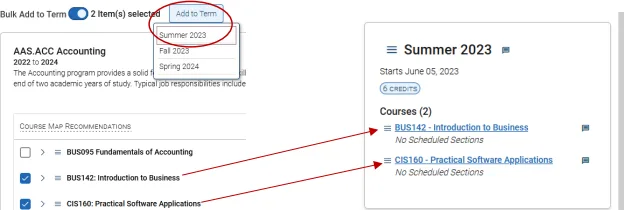
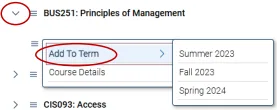
Advisors can also add courses to the Academic Plan from the template individually when Bulk Add to Term is toggled off. Add an actual course by expanding a recommendation using the button and then clicking the menu and selecting Add to Term from the dropdown, followed by selecting the term.
Search For and Add Courses
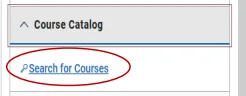
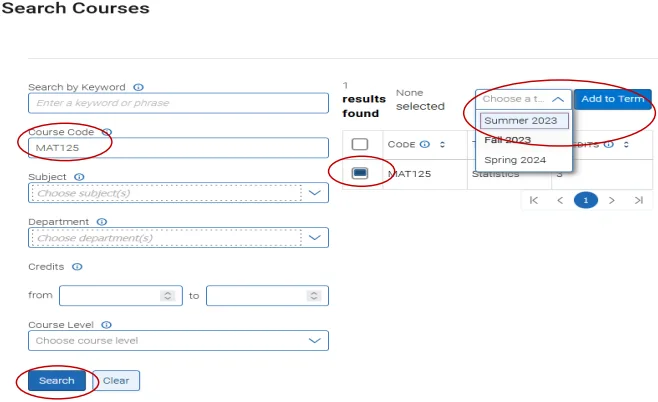
Advisors can also search for and add courses to the Academic Plan not included in the template. The link is located in the Planning Tools menu under the Course Catalog tab on the left of Shared Workspace. The Search Courses page opens in the center panel. Use the filters to find courses and then click Search. Results will then show.
To add one or more courses to the plan, select the checkbox in front of the courses and choose a term from the dropdown at the top of the results. Then select Add to Term.
Courses then appear in the My Academic Plan panel. Repeat these actions to add more courses to the Academic Plan. To return to the program template, do NOT use the browser Back function. Instead, go back to the Planning Tools, open Template Library, and select View Selected Template.
Degree Audit
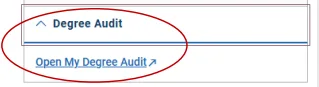
You can access a student’s degree audit from the Degree Audit tab at the bottom of the left-side panel. Click on Open My Degree Audit to be directed to Self-Service, where you will be able to search for and select the student and run a Progress report.
Adding Comments to the Plan
You can add notes or comments to a semester or course if there is additional information to share with the student.

Sending a Draft Plan to the Student
Once finished adding items to the Academic Plan, you can send a draft of the plan to the student. Do this by clicking the Send Plan to/Send Suggestions button.
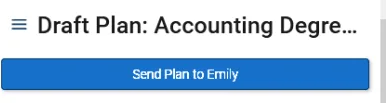
When you click the button, a Send Suggestions to Student dialog opens. You can change the title of the draft plan and add overall comments and suggestions.
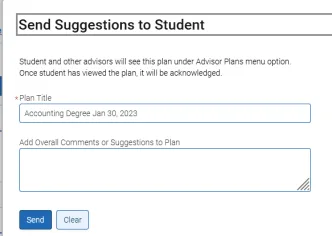
Click Send to send the plan to the student.
Next Steps
The next time the student logs in to Navigate, they see the advisor’s recommended plan on the left panel of their Academic Planner. If they have opted in to Academic Planning notifications in Navigate Student, they will also receive notifications through their preferred notification method(s). Clicking the Advisor Plan displays it to the student, allowing them to use it to inform their academic planning.